Dexcom Hacks

[Dexcom assist products here]
However, the patch is designed to be manipulated with two hands. Fingers of each hand are needed to grab the two tiny, grabbable extensions pointing out from the oval shape. (See image on right)
That's a problem of course. Because you only have one freely movable hand. It's one of a number of problems encountered when attempting to plant the sticky and flexible patch flat against the skin at the back part of your arm and in alignment with the sensor.
Here's an interesting aside: I had not previously thought to "articulate" the several problems involved. Articulation can be an important part of solving problems that we sense but don't formally address. [See QAB-y here] [See wiki article here]
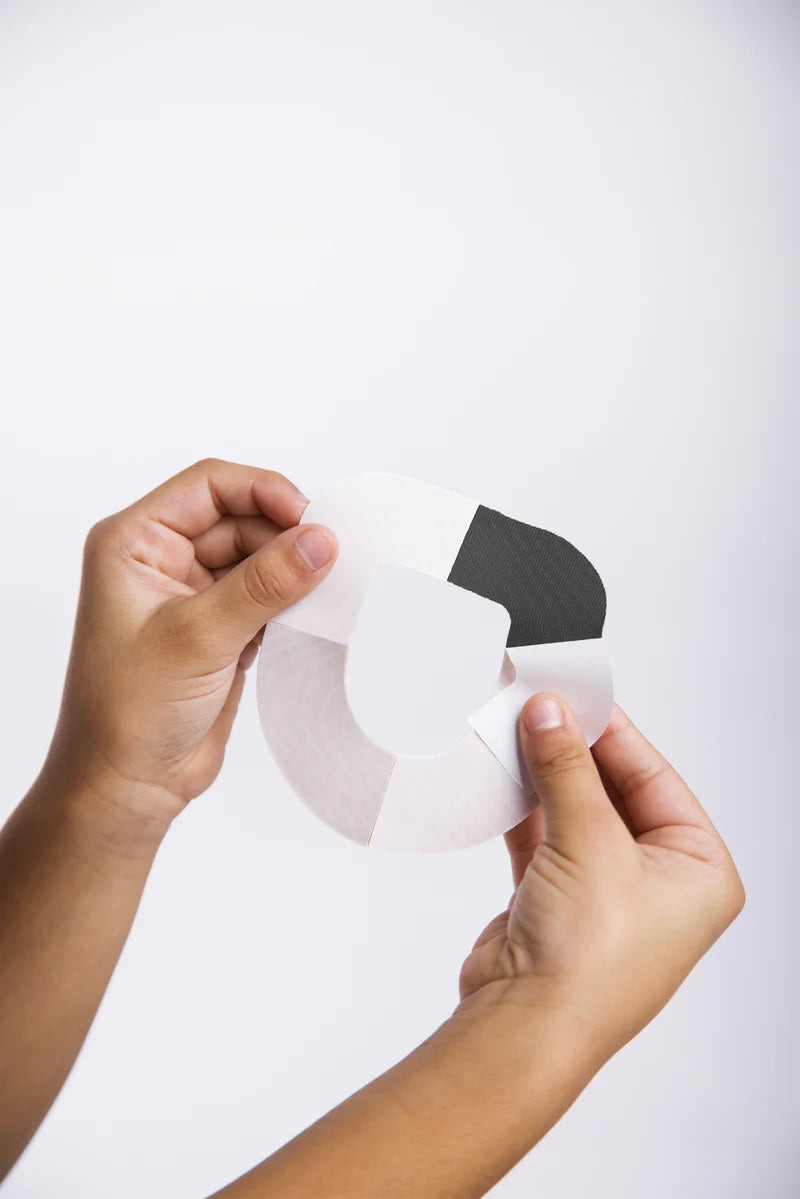
The impetus for this post is that I had made a hard plastic "gizmo" (not shown) for home use. The plastic piece is transparent and is used with aid of my iPhone camera in facetime mode to hold and apply the patch to the back of my arm with just one hand.
But in a recent road trip, I forgot to bring the gizmo with me. I did however have some Ziploc bags on hand and some scotch tape.
Turned out to be enough to hack together an applicator of sorts. Perhaps superior to my at-home, hard plastic gizmo.
STEP # 1:

STEP # 2:

With your free hand holding the stiffer ribs, and with your smartphone camera showing you the back of your hand where the Dexcom G7 sensor is already installed, carefully align the hole of the patch over the the sensor and then press flat using the flexibility of the Ziploc bag for allowing a flat press-on operation.
STEP # 3 :

How to attach the green patch while on the road
Recognize one of the problems = finger extensions are too small
Fool-proof Alignment of the Green Backed Patch

The new GBD patch aligns to the hung-on flexible half tube and thus to the installed sensor !!!!
More Dexcom Hacks
QAB-y ::: Using Packaging Materials for DIY Hacks--^^^-- Make a Strong & Elegant Box from Scrap Cardboard [= COMPELing ]
--^^^-- QAB-y ::: Using Plastic Packaging Materials for DIY Hacks
--^^^-- Stop Throwing Away Plastic Containers! Mind-Blowing DIY Ideas / DIY NVENT
[= DIY INVENT ] [play = plastics ]
--^^^-- Don't Throw Away Plastic Bottles! Brilliant Reuse Ideas ♻️ | DIY Invent
--^^^--
--^^^--
--^^^--
--^^^--
--^^^--
--^^^--
 This --> (sequence of images on right) was an attempt that almost worked except the OD (outer diameter) of the plastic bottle was a tad too large. No margin of white shows when placed over the white post card. Oh well. At least now I have a sample to compare with when I stumble across a similar sized bottle
QAB-g ::: Hacks Using Plastic Bottles
^^^-- ::: How to reuse plastic bottles for projects
^^^-- Melt it while wearing mask and form new plastic items, fill them with coins or other heavy solids (sand) to make weights, ... more ???
YT ::: 56 Brilliant Ways To Reuse Plastic Bottles [settings / speedup x2] [= RomanUrsuHack[s] ]
^^^-- 195 Brilliant Ways To Reuse Plastic Bottles [3 hours]

1) Plastics
1a) Hard, rigid
1b) Soft, flexible
2) Woods
3) Metals (e.g. aluminum can, aluminum foil)
Soda /Drink containers / bottles
Medical Containers & Lids
Beauty supplies, Cleaning supplies
Make cylinders, bands, strings
Additive = add tape, band material, flex metal strips
Subtractive = lathe off, cut, scratch,
Deform = with heat,

 I was wrong.
Cone in the middle doesn't work.
Several reasons for why:
1) Not enough clearance
2) Patch adhesive sticks to cone
3) Holding cone in place is difficult

1) 2 or more alignment posts on the OUTSIDE and centered about the inserted sensor, the posts are held to the skin with one-sided transparent packaging tape
2) A first mask situates over the inserted sensor and has holes for marking the positions of the to-be-taped on alignment posts
3) A second mask has larger holes in same spots for receiving the alignment posts and riding down on them with the green patch being mounted on the mask and centered relative to those externally-surrounding alignment posts
The double-throw hinge method:
1) moving part of hinge has hole for sensor and and patch
2) stationary part of hinge has location holes / pen lines for repeat alignment after you center the hinge hole in dry-run mode first, mark the pen holes /lines then but don't tape on yet
3) Add the "hot" patch on the hole (adhesive exposed)
4) re-align and tape the stationary part
5) throw the moving part a second time with the "hot" patch on it

Central target surrounded by alignment columns [inverted image of ]
Gazebo example

Comments
Post a Comment